 Save
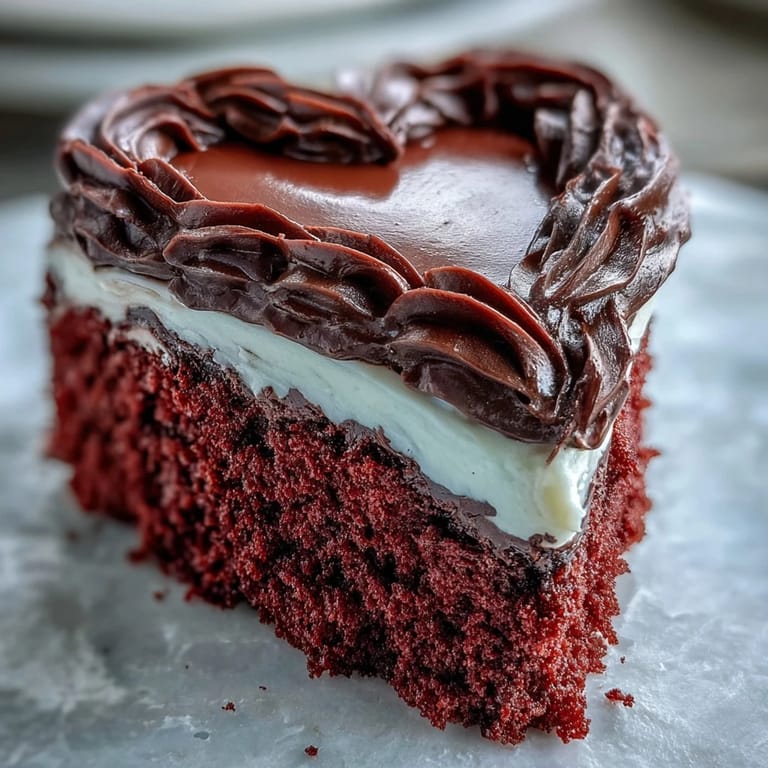
Save My neighbor showed up at my door with a heart-shaped pan she'd found at a yard sale, insisting I had to try it. I wasn't planning to bake that weekend, but her excitement was contagious, and I ended up making this cake on a whim. The red crumb turned out softer than I expected, and when I placed that dark chocolate Betty Boop silhouette on top, it looked like something from a vintage diner menu. We ate two slices each standing at the kitchen counter, laughing about how good it felt to make something just because.
I made this for a friend's birthday, and she gasped when she saw the cake. She collected Betty Boop memorabilia as a kid, and this brought back all those memories for her. We sat around the table, and everyone kept reaching for seconds, not just because it tasted good, but because it sparked conversations about cartoon lunch boxes and Saturday mornings. It reminded me that dessert can be more than sugar and flour.
Ingredients
- Cake flour: This gives the crumb that tender, velvety texture you want in a red velvet-style cake, sifting it ensures no lumps sneak in.
- Natural unsweetened cocoa powder: Just enough to add depth without turning this into chocolate cake, it quietly supports the red color.
- Red gel food coloring: Liquid dyes can water down your batter, gel keeps the color vibrant without messing with moisture balance.
- Buttermilk: The acid in buttermilk reacts with baking soda to create lift and a subtle tang that balances sweetness.
- White vinegar: Activates the baking soda right before baking, giving you that airy, light crumb.
- Cream cheese: Room temperature is non-negotiable here, cold cream cheese will give you lumps no amount of mixing can fix.
- Powdered sugar: Sifting prevents gritty frosting, it takes an extra minute but makes all the difference.
- Dark chocolate: Melts smoothly and sets crisp, creating a silhouette that snaps cleanly when you cut into it.
Tired of Takeout? 🥡
Get 10 meals you can make faster than delivery arrives. Seriously.
One email. No spam. Unsubscribe anytime.
Instructions
- Prep your pans:
- Grease those heart-shaped pans generously and line the bottoms with parchment. If you skip this step, you'll be scraping cake off the pan later, trust me.
- Mix the dry ingredients:
- Whisk together the cake flour, cocoa powder, baking powder, baking soda, and salt in a medium bowl. Set it aside and resist the urge to skip the sifting, clumps ruin texture.
- Cream butter and sugar:
- Beat the butter until creamy, then add sugar gradually, mixing for 2 to 3 minutes. The mixture should look pale and fluffy, this is where you build structure.
- Add eggs one at a time:
- Beat on low after each egg, scraping down the bowl sides as you go. Rushing this step can cause the batter to split.
- Stir in color and flavor:
- Mix in the red gel food coloring, vanilla extract, and white vinegar until evenly distributed. The batter will look shockingly red, that's exactly what you want.
- Alternate wet and dry:
- Add one-third of the dry ingredients, then half the buttermilk, mixing just until combined. Repeat, ending with dry ingredients, and avoid overmixing or the cake will turn dense.
- Activate the leavening:
- Combine the teaspoon of vinegar with baking soda in a small cup, then fold it gently into the batter. It will foam slightly, and that's what creates the tender crumb.
- Divide and bake:
- Split the batter evenly between the pans and smooth the tops with an offset spatula. Bake for 25 to 30 minutes, checking with a toothpick, it should come out clean.
- Cool completely:
- Let the cakes cool in the pans for 10 minutes, then invert onto wire racks and peel off the parchment. If you frost them warm, the frosting will melt into a mess.
- Make the frosting:
- Beat the cream cheese and butter until smooth, then gradually add powdered sugar, a pinch of salt, and vanilla. Mix until fluffy and keep it covered in the fridge until you're ready to use it.
- Level and layer:
- If the cake domes are uneven, level them with a serrated knife. Place one layer on a cake board, pipe or spread frosting on top, then add the second layer and press gently.
- Apply the crumb coat:
- Spread a thin layer of frosting over the entire cake to trap crumbs, then chill for 10 minutes. Add a final smooth layer of frosting, using an offset spatula to create swirls or a clean finish.
- Create the chocolate silhouette:
- Place your Betty Boop stencil under parchment paper, then pipe or brush melted dark chocolate over the outline. Let it set at room temperature or in the fridge for 10 minutes.
- Add the silhouette:
- Carefully peel the chocolate from the parchment and press it gently onto the center of the frosted cake. It should stick without much effort.
- Decorate and chill:
- Add frosting rosettes, edible glitter, or red sugar pearls around the edges if you like. Chill the cake for 30 minutes before slicing, use a warm, clean knife for neat cuts.
 Pin it
 The first time I served this at a potluck, someone asked if I'd ordered it from a bakery. I laughed and said no, but the compliment stuck with me. It reminded me that homemade doesn't have to mean humble, sometimes it can be bold and playful and a little bit extra. That's what this cake is, a celebration disguised as dessert.
How to Get the Perfect Red Crumb
The key is using gel food coloring and not overdoing the cocoa powder. Liquid dyes dilute the batter and make the color muddy, while gel gives you that vibrant red without changing the texture. I learned this after a batch turned out more pink than red, and I've stuck with gel ever since. The cocoa is there for flavor and a hint of depth, not to turn this into chocolate cake.
Working with Heart-Shaped Pans
Heart-shaped pans can be tricky because the point at the bottom bakes faster than the rounded top. I rotate the pans halfway through baking to even things out, and I always check the center with a toothpick a few minutes early. Greasing and lining with parchment is non-negotiable, the shape makes it harder to release cleanly. If you don't have heart pans, this works beautifully in round pans too, just adjust your Betty Boop silhouette to fit.
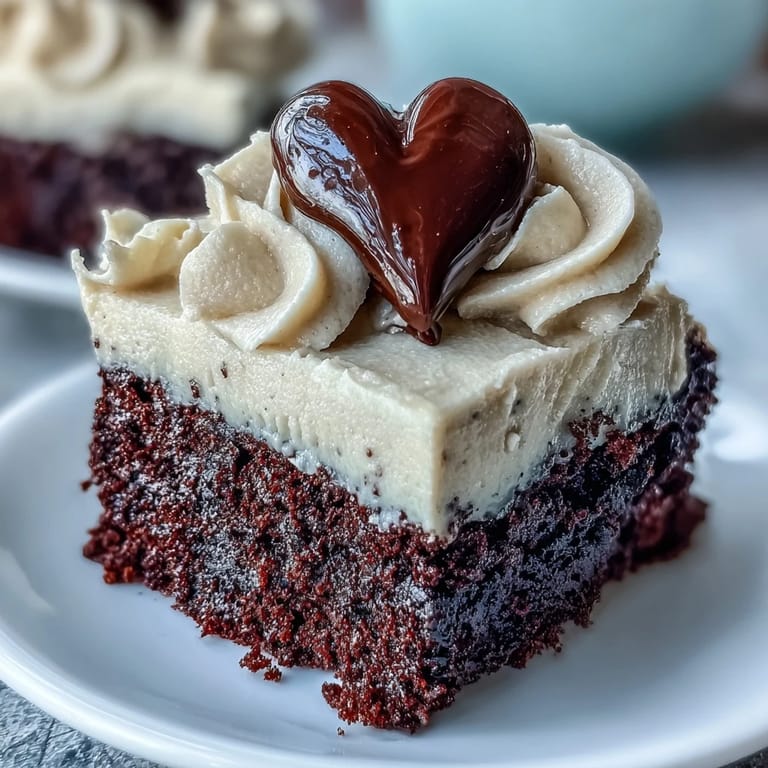
Making the Chocolate Silhouette
The chocolate silhouette is easier than it looks, but it does require a steady hand and patience. I print or draw the Betty Boop outline, slide it under parchment, and trace with melted chocolate using a piping bag or a small spoon. Dark chocolate sets firm and snaps cleanly, but you can use white chocolate tinted black if you want a starker contrast. Let it set completely before peeling it off the parchment, rushing this step will cause it to crack.
- If the silhouette breaks, press the pieces together on the cake and it will still look intentional.
- You can make extra silhouettes and freeze them for future cakes.
- Use oil-based food coloring if you're dyeing white chocolate, water-based will cause it to seize.
 Pin it
 This cake has become my go-to when I want to make someone feel special without overthinking it. It's bold, it's fun, and it tastes like a hug in cake form.
Frequently Asked Questions
- → Can I use a regular round pan instead of heart-shaped?
Yes, you can use two 9-inch round cake pans. The baking time and temperature remain the same, though the presentation will differ from the heart shape.
- → How do I prevent the cake from turning brown instead of red?
Use gel-based food coloring rather than liquid, and ensure your cocoa powder is natural and unsweetened, not Dutch-processed, which can dull the red color.
- → Can I make the chocolate silhouette ahead of time?
Absolutely. Prepare the chocolate decoration up to one week in advance and store it in an airtight container in a cool, dry place until ready to use.
- → What can I substitute for buttermilk?
Mix 1 cup of whole milk with 1 tablespoon of white vinegar or lemon juice. Let it sit for 5 minutes until it curdles slightly, then use as directed.
- → How do I achieve smooth frosting without crumbs?
Apply a thin crumb coat first, refrigerate for 10-15 minutes to set, then add your final frosting layer. Use an offset spatula warmed in hot water for the smoothest finish.
- → Can this cake be frozen?
Yes, wrap unfrosted cake layers tightly in plastic wrap and aluminum foil. Freeze for up to 3 months. Thaw in the refrigerator overnight before frosting and decorating.