 Save
Save The first time I attempted a character cake, my kitchen looked like a craft room explosion. There was red food coloring somehow splattered on cabinets I swore I had covered, and fondant stuck to places it had no business being. But when that Betty Boop cake came together, something magical happened. My niece walked in, gasped, and suddenly all the mess was worth it. Now it is the cake she requests for every milestone celebration.
Last summer I made this for a 1950s themed dinner party and watched adults line up for photos beside it like they were meeting a celebrity. Something about that iconic black hair and red lip silhouette makes people smile before they even take a bite. The cake disappeared faster than the cocktail weenies, and three people asked for the recipe before dessert was even over.
Ingredients
- all purpose flour: Provides the structure for those tall proud layers that stack without collapsing
- granulated sugar: Sweetens while creating that tender velvet texture we love in red cake
- baking powder: Gives the lift needed for light airy layers that still feel substantial
- salt: A pinch balances sweetness and enhances all the other flavors
- unsalted butter: Room temperature butter creates the perfect foundation for both cake and frosting
- large eggs: Room temperature eggs incorporate better for a uniform crumb structure
- whole milk: Adds moisture and richness that makes each bite memorable
- vanilla extract: Pure vanilla rounds out the flavor profile beautifully
- red gel food coloring: Gel coloring delivers that deep cartoon red without thinning the batter
- cream cheese: Cold cream cheese creates that signature tangy frosting we crave
- powdered sugar: Sifted sugar ensures silky smooth buttercream every time
- black white and red fondant: These transform a delicious cake into a showstopping character
- edible pearl dust: Optional but adds that professional photographer worthy shine
Tired of Takeout? 🥡
Get 10 meals you can make faster than delivery arrives. Seriously.
One email. No spam. Unsubscribe anytime.
Instructions
- Prep your pans and oven:
- Preheat oven to 350°F and grease two 8-inch round pans with parchment paper for easy release later
- Whisk the dry ingredients:
- In a medium bowl, combine flour, baking powder, and salt then set aside for later
- Cream butter and sugar:
- Beat butter and sugar on medium speed for about 3 minutes until pale and fluffy
- Add eggs and vanilla:
- Beat in eggs one at a time, then stir in vanilla until fully incorporated
- Combine wet and dry:
- Alternate adding flour mixture and milk in three additions, starting and ending with flour while scraping the bowl
- Add the signature color:
- Mix in red gel food coloring until the batter reaches that deep cartoon red
- Bake the layers:
- Divide batter evenly between pans and bake for 25 to 30 minutes until a toothpick comes out clean
- Cool completely:
- Let cakes rest in pans for 10 minutes, then invert onto wire racks until completely cool
- Make the buttercream:
- Beat cream cheese and butter until smooth, then gradually add powdered sugar until fluffy
- Assemble the cake:
- Trim domes level, stack layers with buttercream between, then apply a crumb coat and chill
- Apply final frosting:
- Spread a smooth final coat of buttercream using a scraper for those polished sides
- Create the decorations:
- Roll black fondant and cut Betty Boops hair silhouette, white circles for eyes, red lips
- Add the finishing touches:
- Attach fondant pieces with dabs of buttercream, add eyelashes, headband, and any final details
- Rest before serving:
- Let the decorated cake rest for 30 minutes at room temperature before slicing
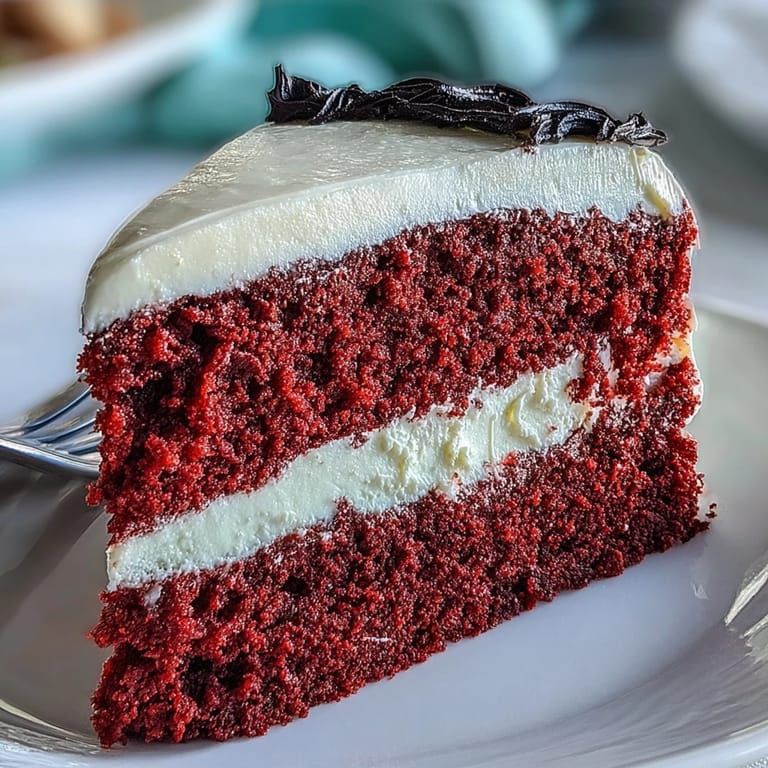
 Pin it
 My niece still talks about the year I made this for her 12th birthday. She kept asking if she could touch the hair and eventually I let her carefully press her finger against the black fondant. That moment of pure childlike wonder over a cake is why I bother with all the fuss.
Making Fondant Work For You
Fondant intimidates everyone at first but it is surprisingly forgiving once you understand it behaves like Play-Doh that can set firm. Work quickly but gently, and keep a small bowl of water nearby to smooth rough edges with your fingertip. The trick is letting it rest briefly if it becomes too elastic.
Getting That Cartoon Red Right
I learned the hard way that liquid food coloring turns batter into a weird soupy mess that never bakes properly. Gel coloring is concentrated, so start with less than you think you need. That deep vibrant red develops slowly, and you can always add more but cannot take it back.
Timing Your Cake Project
This cake rewards those who plan ahead but punishes those who rush. Bake layers a day in advance and wrap them well at room temperature. Make buttercream ahead too but let it come to room temperature before frosting. Fondant decorations can be cut days early and stored in airtight containers.
- Set aside three hours from start to finish for your first attempt
- Have all fondant tools and templates ready before you start decorating
- Keep a small bowl of warm water nearby for smoothing fondant seams
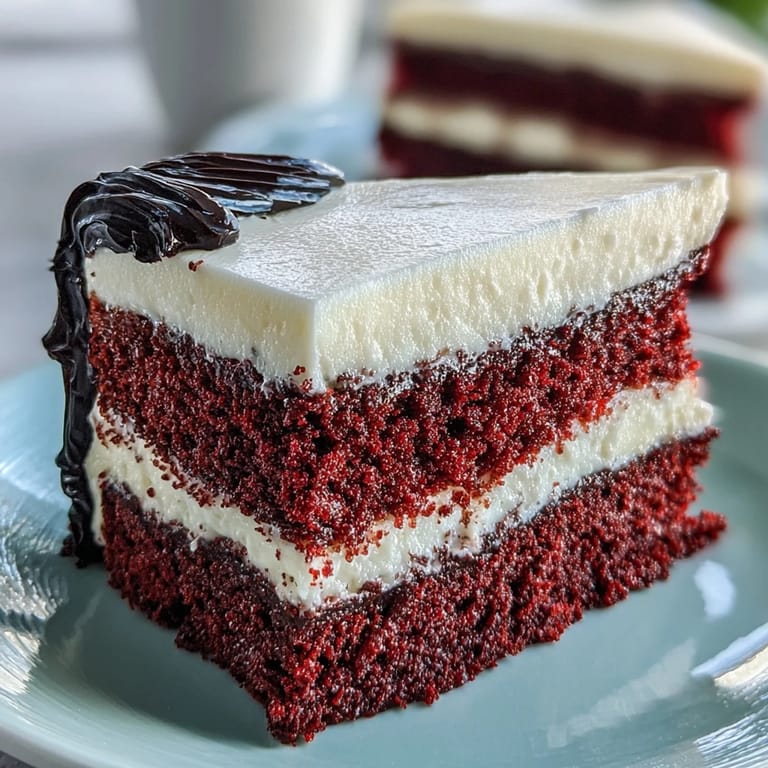
 Pin it
 Every time I serve this cake, someone inevitably asks which bakery made it. That moment of disbelief when I say it came from my home kitchen never gets old.
Frequently Asked Questions
- → Can I make this cake without fondant decorations?
Yes, you can pipe the hair, eyes, and lips using black, white, and red buttercream instead of fondant for a simpler approach.
- → How do I store leftover cake?
Store covered in the refrigerator for up to 4 days. Bring to room temperature 30 minutes before serving for best flavor and texture.
- → Can I prepare the layers in advance?
Absolutely. Bake and cool the layers, wrap tightly in plastic wrap, and refrigerate up to 2 days or freeze up to 1 month before assembling.
- → What if I don't have gel food coloring?
Liquid food coloring works but requires more volume to achieve deep red color, which may slightly affect batter consistency. Gel is preferred for vibrant hue.
- → How can I achieve smoother buttercream sides?
Apply a thin crumb coat first, chill thoroughly, then add the final layer. Use a cake scraper or offset spatula dipped in hot water and dried for smoothest finish.
- → Is this suitable for beginners?
This is an advanced project due to fondant work and layering techniques. Beginners should practice basic frosting and fondant handling before attempting this design.