 Save
Save The smell of these baking takes me back to late nights during my internship days when I needed something substantial but refused to survive on ramen. I stumbled upon this two-ingredient dough hack by accident when I was out of eggs and bread, and honestly, it changed my entire approach to quick meals. Now my toddler asks for 'pizza envelopes' by name, and I actually feel good about saying yes.
Last Super Bowl, I made these instead of ordering wings, and my brother-in-law ate three before asking what restaurant they came from. There is something deeply satisfying about pulling that golden, flaky pocket open and watching the cheese stretch. They reheat beautifully, which is rare for homemade comfort food.
Ingredients
- Low-fat Greek yogurt: This creates the dough structure and adds protein without any butter or oil. The tang actually complements the savory filling beautifully.
- All-purpose flour: You can use almond and coconut flour blend for low carb, but regular flour gives the best texture for that classic hot pocket experience.
- Baking powder: Essential for getting that slight puff in the dough so it does not bake up dense or tough.
- Italian seasoning and garlic powder: These herbs get baked right into the dough, so every bite tastes like pizza even before you hit the filling.
- Pizza sauce: Use about 15 grams per pocket. Any more and they will get soggy in the oven.
- Low-fat mozzarella: One slice per pocket gives you that cheese pull without excessive grease or calories.
Tired of Takeout? 🥡
Get 10 meals you can make faster than delivery arrives. Seriously.
One email. No spam. Unsubscribe anytime.
Instructions
- Prep your oven and station:
- Preheat to 375°F and line a baking tray with parchment paper. Having everything ready before you start mixing makes the whole process feel seamless.
- Whisk the dry ingredients:
- In a large bowl, combine the flour, baking powder, Italian seasoning, garlic powder, and salt. Make sure there are no clumps of baking powder hiding anywhere.
- Form the dough:
- Add the Greek yogurt and mix with a spatula until a shaggy dough forms. It will look messy at first but trust the process.
- Knead it smooth:
- Transfer to a floured surface and knead for 2 to 3 minutes. The dough should transform from shaggy to smooth and elastic under your hands.
- Divide and roll:
- Split the dough into 8 equal pieces. Roll each into an oval about 6 inches long, keeping them roughly the same size so they bake evenly.
- Add the filling:
- Place 1 tablespoon of pizza sauce and 1 slice of cheese on one half of each oval. Leave a ½-inch border so you can seal them properly.
- Seal the pockets:
- Fold the dough over and crimp the edges with a fork. Dip the fork in water if the dough is not sticking to itself.
- Bake until golden:
- Bake for 18 to 20 minutes until the tops are golden brown and feel crisp to the touch. Let them cool for 5 minutes or the cheese will burn your mouth.
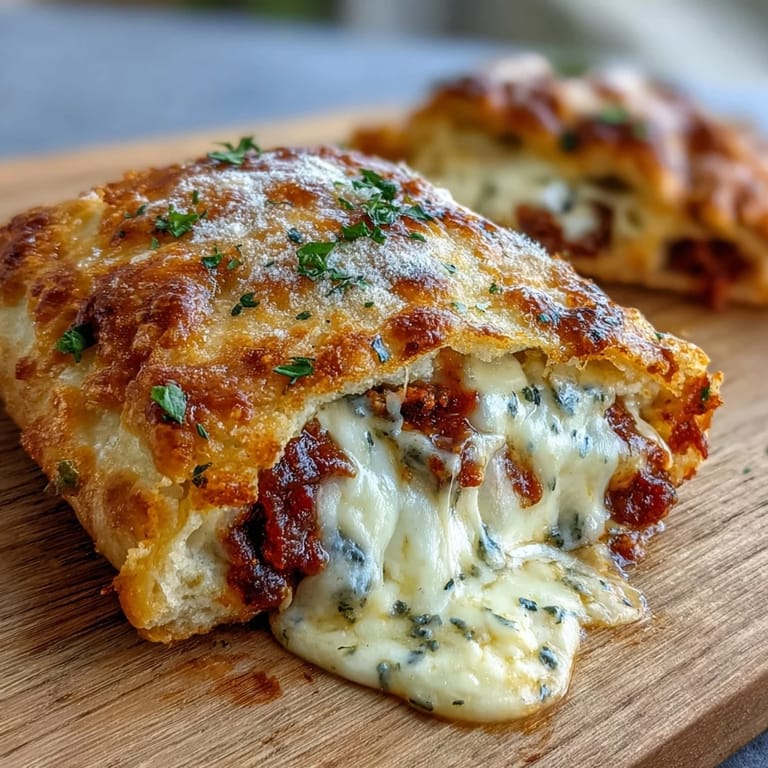
 Pin it
 My friend Sarah started making these for her kids lunch boxes and said they actually ask for them instead of the store-bought version. Food that bridges the gap between nutrition and nostalgia feels like a small victory.
Freezing Instructions
These freeze exceptionally well. I always double the batch and freeze half for those days when cooking feels impossible. Wrap each cooled pocket individually in plastic wrap, then store them in a freezer bag. They will keep for up to three months.
Customization Ideas
Sometimes I add cooked ground turkey or crumbled plant-based sausage for extra protein. You can also swap the mozzarella for pepper jack and add jalapeños if you like heat. The dough base is incredibly forgiving.
Serving Suggestions
A fresh green salad on the side makes this feel like a complete meal. I also love serving them with roasted vegetables or a light soup. The pockets are substantial enough to stand alone but pair beautifully with something fresh and crisp.
- Brush the tops with olive oil before baking for extra golden color
- Sprinkle everything bagel seasoning on the dough after sealing
- Marinara sauce on the side for dipping takes these over the top
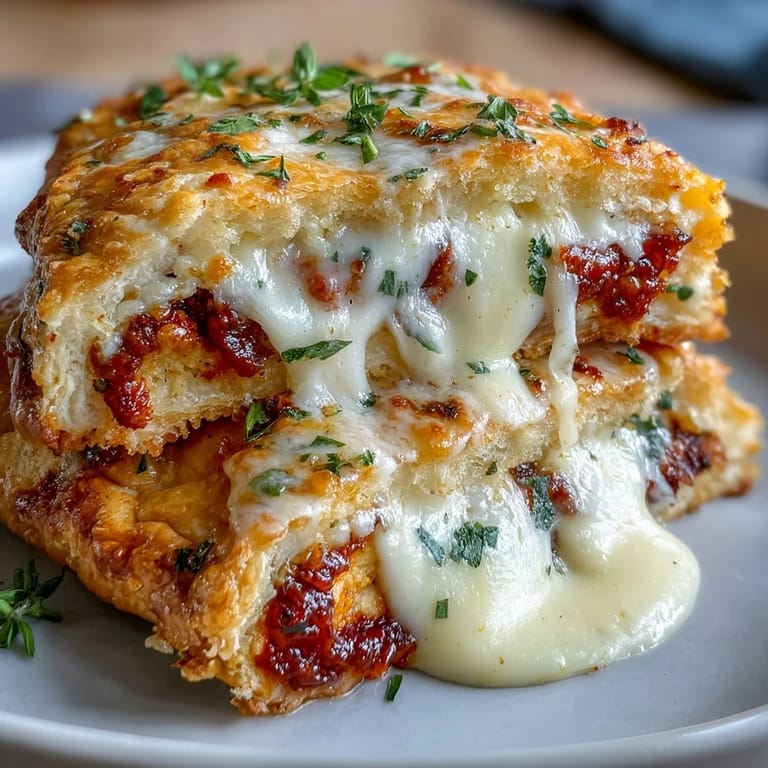 Pin it
 These have become my go-to when I want something that feels indulgent but actually fuels my body. Hope they find a regular spot in your kitchen rotation too.
Frequently Asked Questions
- → Can I make the dough ahead of time?
Yes, prepare the dough up to 24 hours in advance and store it wrapped in the refrigerator. Let it come to room temperature for about 10 minutes before rolling and filling for easier handling.
- → What's the best way to reheat frozen pockets?
Reheat frozen pockets in a 350°F oven for 12-15 minutes until heated through, or use a toaster oven for 8-10 minutes. Avoid microwaving as the crust may become soggy.
- → Can I use regular flour instead of the low-carb blend?
Absolutely. All-purpose flour works perfectly and creates a classic texture. The low-carb almond and coconut flour combination is an alternative option for those watching carbohydrates.
- → How do I prevent the filling from leaking during baking?
Leave a ½-inch border around the edges when adding filling, and seal thoroughly with a fork. If dough feels dry, lightly brush the edge with water before pressing to help it adhere better.
- → Can I add meat to the filling?
Certainly. Cooked lean ground turkey, chicken, or even pepperoni make excellent additions. Just ensure any meat is fully cooked before adding, about 2-3 tbsp per pocket max to prevent overfilling.
- → Are these freezer-friendly?
These pockets freeze exceptionally well. Once completely cooled, place them in a freezer-safe bag with parchment paper between layers. They'll keep for up to 3 months.