Save
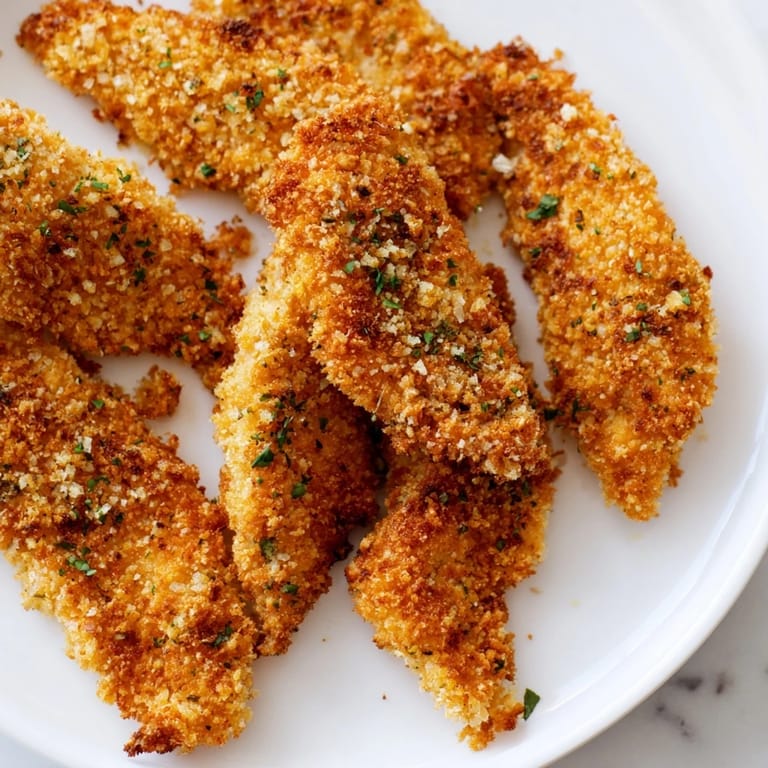
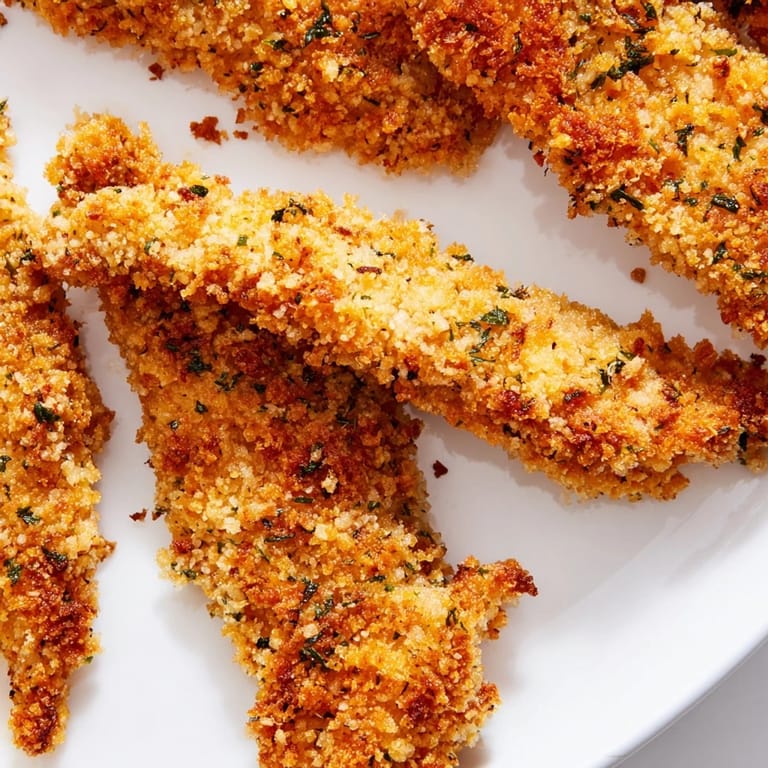
Save The oven timer was about to go off when I realized I'd forgotten to flip them. I pulled the tray out in a panic, but the strips were already halfway to golden perfection, steam rising in soft puffs. That night taught me something crucial: sometimes a hot oven and a little olive oil can do what a deep fryer does, minus the splatter and guilt. These panko chicken strips have been my weeknight hero ever since, crispy on the outside, tender within, and shockingly simple to pull off.
I made these for a casual Sunday gathering once, setting out three different dipping sauces just to see what would happen. The honey mustard disappeared first, but the real surprise was watching my friend's toddler dunk a strip into sriracha mayo without flinching. There's something about a golden, crunchy exterior that makes people brave. The platter was empty before halftime, and I've been doubling the batch ever since.
Ingredients
- Boneless, skinless chicken breasts or tenders (500 g): Tenders cook faster and stay juicier, but breasts work perfectly if you slice them into even strips so everything finishes at the same time.
- Salt (1/2 tsp) and black pepper (1/4 tsp): Season the chicken directly before breading so the flavor goes all the way through, not just on the surface.
- All-purpose flour (100 g): This first coating helps the egg mixture cling, creating a base layer that keeps the panko from sliding off during baking.
- Large eggs (2) and mayonnaise (2 tbsp): The mayo adds richness and helps the egg stick better, though Greek yogurt works if you want a lighter, tangier alternative.
- Panko breadcrumbs (120 g): Their airy, jagged texture is the secret to that crispy crunch, far superior to regular breadcrumbs in the oven.
- Dried Italian herbs (1 1/2 tsp), garlic powder (1/2 tsp), smoked paprika (1/2 tsp): This trio builds layers of flavor that make every bite interesting without overwhelming the chicken.
- Cayenne pepper (1/4 tsp, optional): Just enough heat to wake up your taste buds without scaring off anyone at the table.
- Olive oil (2 tbsp): A light drizzle or spray gives the panko the fat it needs to crisp up and turn golden in the oven.
Tired of Takeout? 🥡
Get 10 meals you can make faster than delivery arrives. Seriously.
One email. No spam. Unsubscribe anytime.
Instructions
- Prep the oven and baking sheet:
- Preheat your oven to 220°C (425°F) and line a baking sheet with parchment paper, or better yet, set a wire rack on top for air circulation underneath. This small step makes a huge difference in crispiness.
- Prepare the chicken:
- Pat the chicken completely dry with paper towels, then slice into strips about 2 cm wide so they cook evenly. Season both sides with salt and pepper right before you start breading.
- Set up your breading station:
- Arrange three shallow bowls in a row: one with flour, one with eggs whisked together with mayonnaise until smooth, and one with panko mixed with all the herbs and spices. This assembly line keeps things tidy and fast.
- Coat each strip:
- Dredge a chicken strip in flour, shake off the excess, dip it into the egg mixture, then press it firmly into the panko so every surface is covered. Repeat until all strips are coated and arranged on your prepared baking sheet.
- Add the finishing touch:
- Drizzle or lightly spray the coated strips with olive oil, making sure the tops get a little shine. This is what turns the panko from pale to golden.
- Bake and flip:
- Slide the tray into the oven and bake for 18 to 22 minutes, flipping the strips halfway through so both sides get evenly crispy. They're done when the internal temperature hits 74°C (165°F) and the coating is deep gold.
- Rest before serving:
- Let the strips cool on the tray for 2 to 3 minutes so the crust sets and stays crunchy. Serve them warm with your favorite dipping sauces.
 Pin it
 One evening, my neighbor dropped by just as I pulled these out of the oven, and she stood in my kitchen eating three strips while telling me about her day. She didn't ask for the recipe until the third one, which I took as the highest compliment. That's when I realized this dish wasn't just easy, it was the kind of food that makes people linger.
Serving Suggestions
I like setting out a trio of sauces: honey mustard for sweetness, ranch for creamy comfort, and sriracha mayo for anyone feeling bold. A simple green salad with lemon vinaigrette balances the richness, or you could go classic with oven fries and coleslaw. If you're serving a crowd, these strips also work beautifully on a platter with pickles, cherry tomatoes, and crusty bread for a casual, help-yourself kind of meal.
Storage and Reheating
Leftovers keep in an airtight container in the fridge for up to three days, though they rarely last that long in my house. When you're ready to eat them again, skip the microwave, it'll turn them soggy. Instead, reheat in a 200°C (400°F) oven for about 8 minutes, and they'll crisp right back up like they just came out the first time.
Customizations and Swaps
If you need this gluten-free, swap in gluten-free panko and flour without changing anything else. For a richer flavor, toss a handful of grated Parmesan into the panko mixture before breading. Greek yogurt in place of mayo lightens things up and adds a subtle tang that pairs beautifully with the herbs.
- Try swapping smoked paprika for regular if you want a milder, sweeter note.
- Double the cayenne if your household likes heat, or leave it out entirely for picky eaters.
- Serve with a crisp Sauvignon Blanc or a cold lager to balance the richness.
 Pin it
 These strips have earned their place in my weekly rotation, not because they're fancy, but because they're reliably delicious and easy enough to make on a Tuesday. I hope they become a staple in your kitchen too.
Frequently Asked Questions
- → How do I get the crispiest coating?
Use a wire rack instead of parchment paper to allow air circulation underneath. Lightly spray or drizzle olive oil over the coated strips before baking. Flip halfway through cooking for even browning. Let cool 2-3 minutes after baking—this helps the coating set and become extra crispy.
- → Can I freeze these before cooking?
Yes, you can freeze breaded strips on a baking sheet for 2 hours, then transfer to freezer bags for up to 3 months. Bake directly from frozen, adding 5-8 minutes to cooking time, until the internal temperature reaches 165°F (74°C).
- → What's the best dipping sauce?
Honey mustard, ranch, and sriracha mayo are classic pairings. For a lighter option, try Greek yogurt mixed with herbs. Homemade aioli or a tangy barbecue sauce also complement the herbed panko beautifully.
- → How do I make this gluten-free?
Simply swap regular flour and panko for their gluten-free counterparts. Ensure your mayonnaise or Greek yogurt is certified gluten-free. The preparation method remains identical, and you'll achieve the same crispy, golden results.
- → Can I use chicken thighs instead of breasts?
Yes, chicken thighs work wonderfully. They're more forgiving and stay juicier. Pound them to similar thickness as breasts for even cooking. Check that the internal temperature reaches 165°F (74°C) before serving.
- → Why use mayonnaise in the egg wash?
Mayonnaise adds richness and helps the breading adhere better while creating an extra golden, crispy exterior. You can substitute Greek yogurt for a lighter, protein-packed alternative with identical results.