 Save
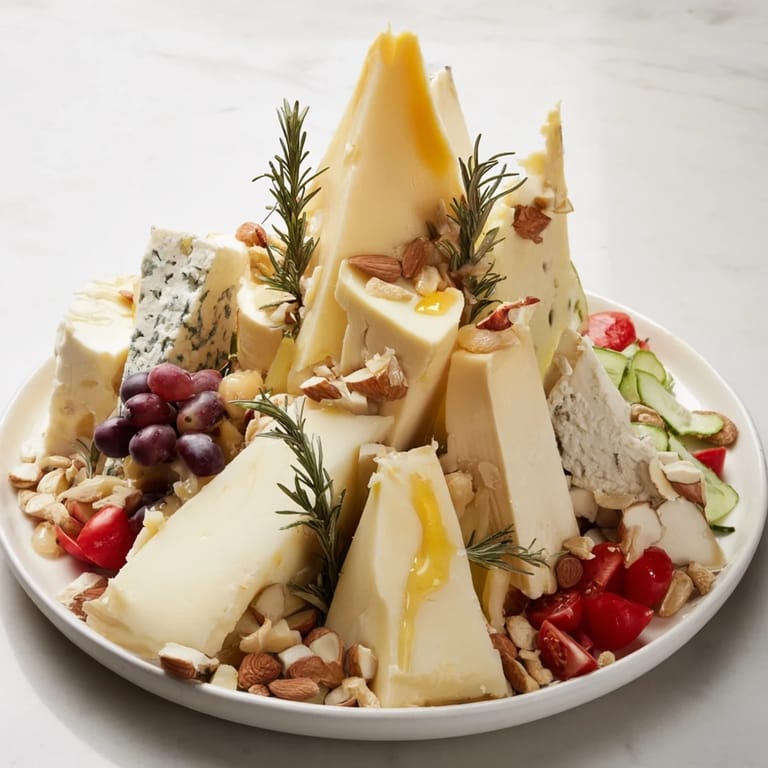
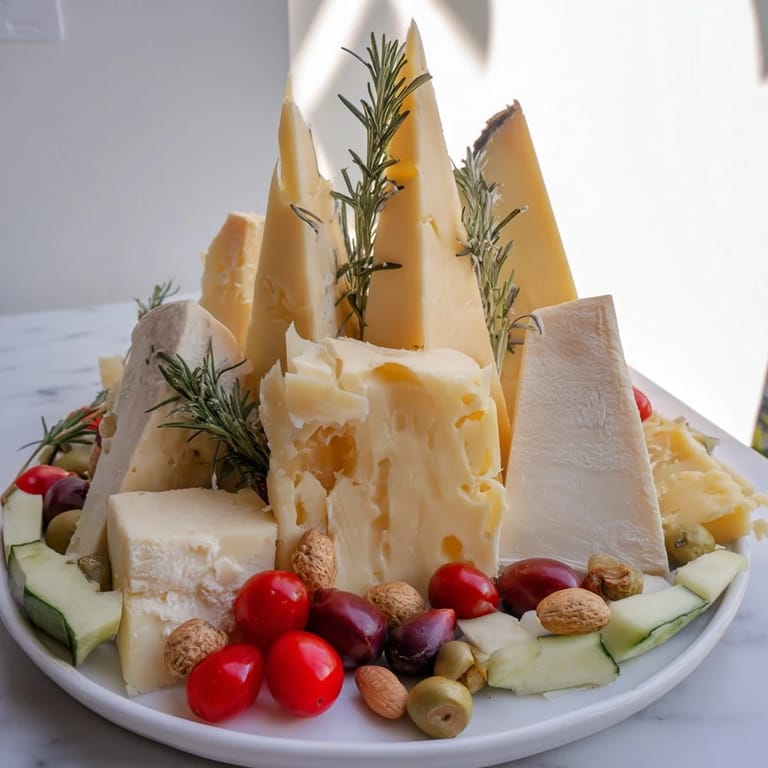
Save I'll never forget the evening a friend challenged me to stop arranging cheese boards like everyone else. We were hosting a dinner party, and instead of the usual scattered circles, I decided to build something sculptural—towering wedges of Manchego standing like dramatic cliffs, valleys filled with jewel-toned grapes and tomatoes. Everyone gathered around the board that night not just to eat, but to admire it first. That's when I realized a cheese board could be art you eat.
My sister came home from a year abroad talking endlessly about a small Spanish restaurant where the cheese board was treated like fine art. When she described it, I thought she was exaggerating—until I realized I could recreate that magic at home. Now whenever we gather, someone asks me to build 'the mountain board,' and I watch people's faces light up exactly the way mine did that first time.
Ingredients
- Aged Manchego (150 g, cut into tall irregular chunks): This Spanish beauty is your star mountain peak—firm enough to stand proudly vertical, with a nutty warmth that makes people reach for it first. I learned to cut thick, uneven chunks rather than neat pieces because the irregular shapes catch light and look far more dramatic.
- Parmigiano-Reggiano (150 g, broken into rugged shards): The granular texture of this Italian classic actually breaks into naturally beautiful pieces. Don't slice it neatly—let it shatter along its own lines and stack those irregular shards upward for maximum visual impact.
- Aged Cheddar (150 g, sliced into tall triangles): A good aged cheddar adds color variation and that familiar comfort flavor. Slice it into tall triangles so each piece has height and presence on your landscape.
- Brie (100 g, cut into thick wedges): Soft, creamy, and golden—these wedges become the gentle rolling hills around your mountain peaks. Cut them thicker than you normally would so they maintain their shape and catch the light beautifully.
- Gorgonzola (100 g, broken into rustic pieces): The blue veining creates visual drama, and the creamy texture works as a contrast to your hard cheeses. Break it by hand rather than cutting to keep edges irregular and interesting.
- Red grapes (1 cup, halved): These become your jewel tones in the valleys. The halves nestle perfectly into crevices and their color is almost too beautiful to be real.
- Cherry tomatoes (1 cup, halved): More visual jewels that add brightness and contrast. Halving them lets them sit naturally in your landscape's contours.
- Cucumber (1 small, sliced into rounds): Fresh green circles that feel like stepping stones across your board. Slice them just before serving so they stay crisp and cool.
- Apple (1 small, thinly sliced): A light sweetness that surprises people. Toss slices in a bit of lemon juice at the last moment to keep them from browning and to add a subtle brightness.
- Dried apricots (1/2 cup): Concentrated sweetness and a sunset color that fills your valleys with warmth. They bridge the gap between sweet and savory beautifully.
- Roasted almonds (1/2 cup): These become your scattered boulders, adding a satisfying crunch. The roasted warmth plays against cold cheese perfectly.
- Walnuts (1/2 cup): Slightly earthier than almonds, their irregular shape makes them look naturally placed on your landscape.
- Thin baguette slices (12): These are your paths across the landscape. Toast them lightly if you want them to hold firm under toppings, or keep them soft if you prefer them to bend naturally with whatever you pile on top.
- Assorted crackers (12): Choose shapes and textures that vary—some delicate, some sturdy. They become plateaus at the edges of your landscape.
- Honey (2 tbsp): Drizzled in small golden pools, honey adds sweetness and catches light like water in a landscape. It's as much about visuals as taste.
- Fresh rosemary sprigs: These aren't just garnish—they add a forest-like earthiness and make the whole thing feel intentional rather than random. Tuck them into crevices and standing among your peaks.
Tired of Takeout? 🥡
Get 10 meals you can make faster than delivery arrives. Seriously.
One email. No spam. Unsubscribe anytime.
Instructions
- Build Your Mountains First:
- Start with a large wooden board as your canvas. Arrange those tall, irregular chunks of hard cheese—Manchego, Parmigiano-Reggiano, and aged Cheddar—standing as vertically as you can manage. Think of them as dramatic peaks rather than food. Stack them, lean them slightly, let them have presence. This takes a few tries to get stable, so work slowly and trust the process.
- Create Your Hills:
- Now place those thick wedges of Brie and rustic pieces of Gorgonzola around the base and sides of your hard cheese mountains. They should look like softer, rolling hills cradling the mountains. Nestle them so they feel anchored but also complement the hard cheeses visually.
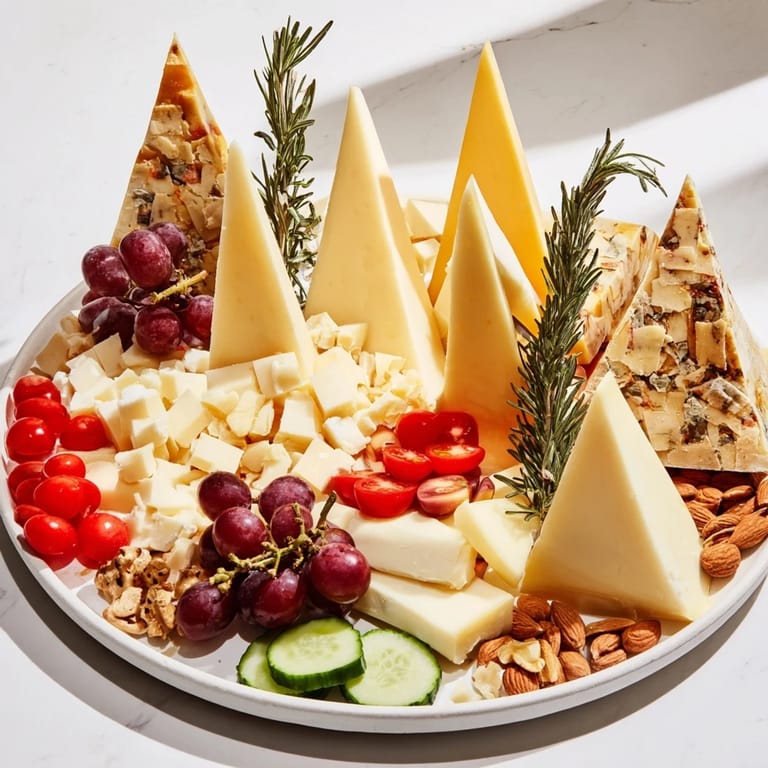
- Fill the Valleys:
- Start clustering your grapes, cherry tomatoes, cucumber rounds, apple slices, and dried apricots into the lower areas and crevices. This is where you get to be an artist—let colors flow naturally, group similar colors together, create little pools of brightness. The halved fruits should nestle naturally into the landscape you've created.
- Scatter Your Boulders:
- Distribute almonds and walnuts across the board like natural stones that have tumbled into the landscape. Let some cluster near the cheese, let others rest alone. They add both texture and visual interest, like geology.
- Create Paths and Plateaus:
- Arrange baguette slices and crackers along the edges and between elements, as if they're paths through this edible world. Don't line them up perfectly—let them curve naturally around your landscape.
- Add the Magic:
- Drizzle honey in small pools or lightly over select cheeses—let it pool naturally in low spots. It catches light beautifully and adds that final touch of intentionality. Tuck fresh rosemary sprigs into crevices and standing among the peaks, as if a forest grows through your cheese landscape.
- Present and Invite:
- Step back and look at what you've created. This isn't just appetizer prep—it's art. When guests arrive, let them pause and admire before serving. Encourage them to explore, to build their own combinations, to treat this landscape as an interactive experience rather than just food to eat.
 Pin it
 The moment that crystallized this for me was watching my five-year-old niece approach the board for the first time. Instead of reaching for cheese, she traced the landscape with her finger, calling out 'mountain,' 'valley,' 'forest.' She was seeing what I'd made not as food, but as an entire world. Her mother laughed and said she'd never seen her so fascinated by an appetizer. That's when I understood—this isn't about cheese. It's about inviting people to see food as something wonderful and worth pausing for.
The Art of Layering Textures
This landscape works because every element plays a different role. Your hard cheeses are the architecture—the framework everything else hangs on. Your soft cheeses are the transition, making the board feel complete rather than two separate categories. Your fruits and vegetables are jewels that catch the eye. Your nuts add crunch that makes people keep coming back for 'just one more,' and your bread and crackers are the foundation that lets people actually eat what you've created. When you understand each ingredient's job, suddenly the whole thing feels intentional rather than random.
The Psychology of Presentation
People eat first with their eyes. I learned this the hard way when I made the most delicious board and arranged it in neat rows like a grocery display. Nobody touched it for twenty minutes. The next week, I made the exact same cheeses but piled them into a landscape, and it disappeared in minutes. The difference wasn't the food—it was the presentation. When something looks like it took thought and care, people trust it tastes the way it looks. They also feel like they're part of something special rather than just grabbing appetizers.
Customizing Your Landscape
The beauty of this recipe is that it's a framework, not a rule. Love sharp cheeses? Use more Parmigiano and blue. Prefer milder flavors? Go heavier on soft cheeses and lighter on the assertive ones. Have dietary restrictions? Swap cheeses entirely—there are beautiful aged alternatives for vegan diets now. The technique—building height, creating valleys, thinking in terms of landscape—that's what matters. The specific ingredients are just what worked for me.
- Seasonal fruit works beautifully—figs in fall, strawberries in spring, whatever looks jewel-like at your market
- You can add cured meats without it looking chaotic if you roll them or fold them to add height
- Edible flowers tucked into crevices add color without changing the structure at all
 Pin it
 This board has become my love language—the thing I make when I want to say 'I'm so glad you're here' without using words. It takes 25 minutes and costs less than most restaurant appetizers, but it says something about how much you value the people sitting around your table.
Frequently Asked Questions
- → What types of cheeses are best for creating the mountain peaks?
Firm and aged varieties like Manchego, Parmigiano-Reggiano, and Cheddar work well due to their sturdy shapes and textures.
- → How can I add texture to the cheese board setup?
Incorporate roasted almonds and walnuts to mimic rocky boulders and provide crunchy contrasts.
- → What fruits complement the cheese landscape?
Fresh grapes, cherry tomatoes, sliced apples, cucumber rounds, and dried apricots add sweetness and freshness in varied shapes.
- → How should breads and crackers be arranged?
Place baguette slices and assorted crackers around edges to create visual paths and plateaus, enhancing the 3D effect.
- → What finishing touches enhance the overall presentation?
Drizzling honey and tucking in fresh rosemary sprigs add subtle sweetness and herbal notes while elevating aesthetics.
- → Can the cheese selection be customized?
Yes, adjust hard and soft cheese types based on preference or local availability to maintain balance and texture.