 Save
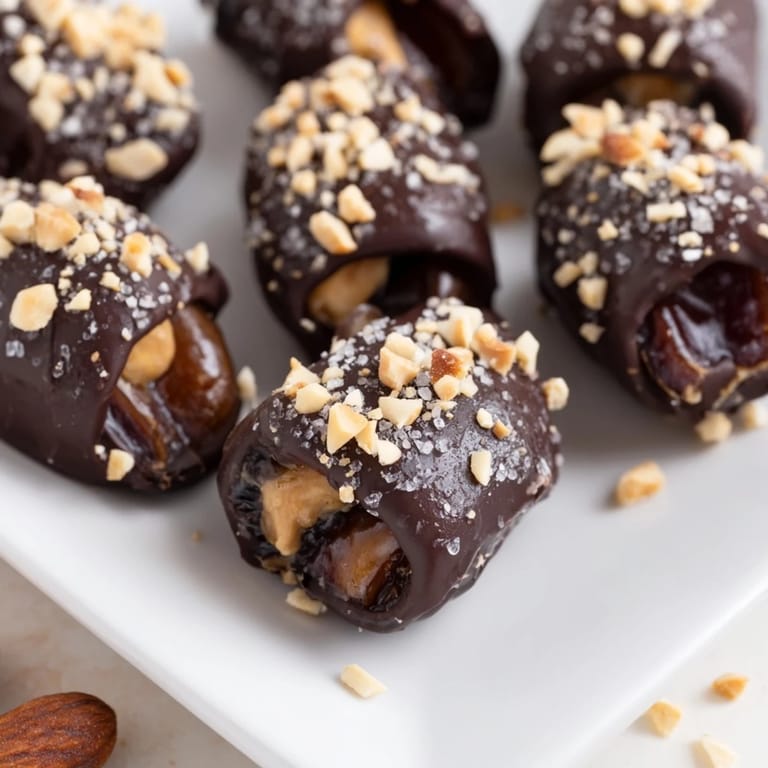
Save My friend Sarah showed up to a dinner party with a tray of homemade date bark, and I watched people's faces light up as they bit into the combination of chewy dates, creamy peanut butter, and dark chocolate. She told me it was her riff on the Snickers bars she'd loved as a kid, but made with real whole foods. I asked for the recipe that night, and now whenever I want something sweet that feels indulgent but doesn't leave me feeling sluggish, this is what I make.
I made this bark last winter when my sister was visiting, and we sat at the kitchen counter cracking pieces off the slab like we were sharing contraband. She kept sneaking them back to the freezer, claiming she was just checking if they were set, and I pretended not to notice her returning empty-handed. By the time she left, we'd eaten half the batch, and I had to make a second one just to have something to show for the effort.
Ingredients
- Medjool dates, pitted and halved (16 total): These are the foundation, and their natural sweetness and chewiness is what makes this taste less like a health food and more like an actual treat.
- Natural creamy peanut butter (1/2 cup): The kind without added sugar or oil separation is your friend here, and it spreads more evenly over the dates.
- Dark or milk chocolate, chopped (200 g): Choose something you'd actually eat on its own, since it's doing real work in this recipe.
- Coconut oil (2 tbsp, optional): This keeps the chocolate from seizing and makes it glossier, though it's not strictly necessary.
- Roasted peanuts, coarsely chopped (1/3 cup): Don't pulverize them into dust; you want little crunchy pieces that break between your teeth.
- Flaky sea salt (optional but recommended): A tiny sprinkle cuts through the sweetness and makes the whole thing taste more sophisticated.
Tired of Takeout? 🥡
Get 10 meals you can make faster than delivery arrives. Seriously.
One email. No spam. Unsubscribe anytime.
Instructions
- Prep your workspace:
- Line a baking sheet or tray with parchment paper so nothing sticks and cleanup is effortless. A small rectangular tray works best if you have one.
- Build the date layer:
- Arrange the pitted halves cut side up in a single layer, letting them overlap slightly so they create a solid, connected base. Don't worry if it's not perfectly neat; the chocolate will cover any gaps.
- Fill the cavities:
- Spread the peanut butter generously over the dates, pressing it into each hollow so you get peanut butter in every bite. A small spatula or the back of a spoon works well here.
- Melt the chocolate:
- Use a microwave in 30-second bursts, stirring between each one, or melt it gently over a double boiler to avoid burning. Add the coconut oil if using, and stir until the mixture is completely smooth and glossy.
- Cover with chocolate:
- Pour or drizzle the melted chocolate over the date and peanut butter layer, spreading it evenly to cover everything. Working quickly before it starts to set is key.
- Add toppings:
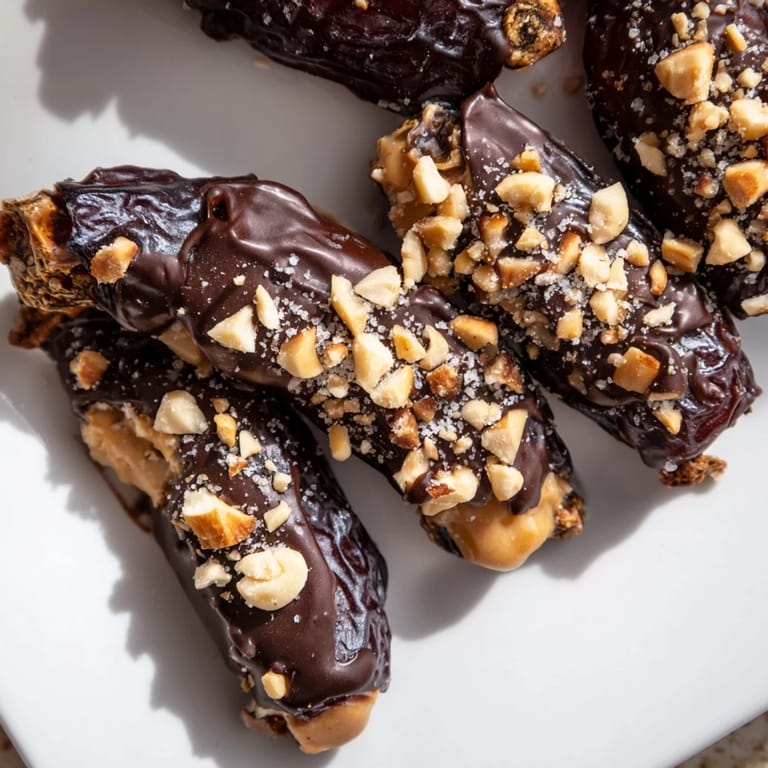
- Sprinkle the chopped peanuts and a light dusting of flaky sea salt over the chocolate while it's still soft and warm. The warmth helps everything stick.
- Freeze until firm:
- Transfer the tray to the freezer for at least an hour, though two hours gives you an even crispier final texture. You'll know it's ready when the chocolate is completely hard.
- Cut and serve:
- Use a sharp knife, wiping it clean between cuts, to slice the bark into rustic pieces. Serve straight from the freezer so the chocolate stays snappy.
 Pin it
 My neighbor knocked on the door one afternoon, frustrated because she'd made something similar and the chocolate had gone all grainy and separated. We looked at her recipe, and she'd used chocolate chips and tried to melt them without adding anything to help them along. We made a fresh batch together that day, and watching the difference that small amount of coconut oil made was genuinely satisfying.
Why This Works So Well
Dates are basically nature's candy, naturally sticky and sweet without tasting processed. Peanut butter adds protein and a savory depth that keeps the whole thing from being one-note sugary. The chocolate acts as both a binder and a contrast, snapping when you bite into it before melting on your tongue. That combination of chewy, creamy, and crisp is exactly what makes a Snickers so craveable, and you get it here without any artificial anything.
Storage and Make-Ahead
I keep mine in an airtight container in the freezer and pull out a piece whenever I want something sweet after dinner. It stays good for at least two weeks, though honestly it never lasts that long in my house. You can also make this the day before a gathering or party, since it actually improves as it sits and the flavors meld together.
Variations Worth Trying
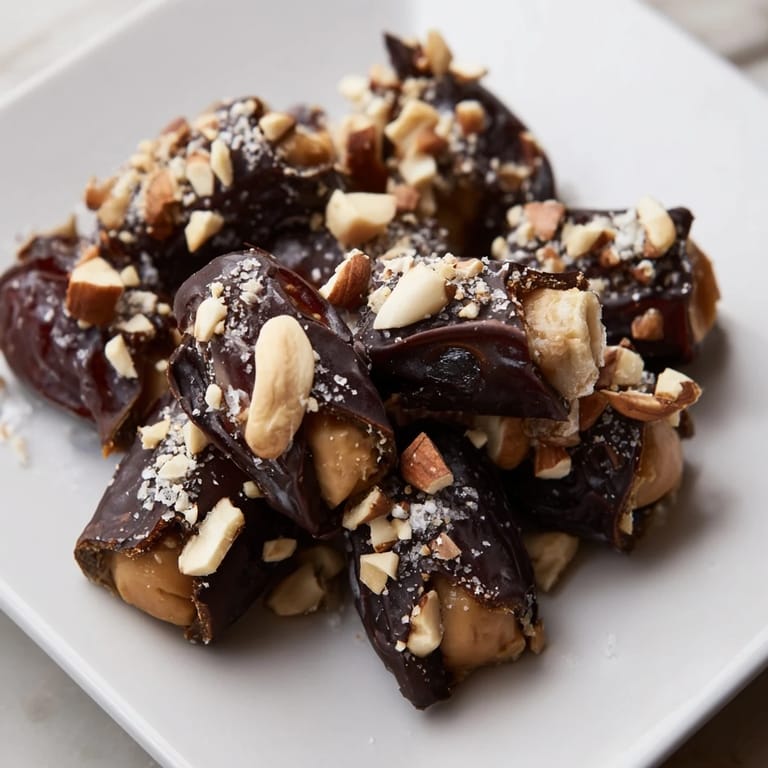
Once you get comfortable with the basic formula, this is endlessly adaptable. I've made it with almond butter when I was out of peanut butter, and it tasted equally good, just slightly less Snickers-like and more sophisticated. The salt is optional, but I never skip it anymore because it genuinely changes the flavor profile. You could also drizzle a thin line of caramel sauce over the chocolate layer before freezing, add a few grains of smoked salt, or sprinkle with cocoa nibs for extra crunch.
- Try different nut butters like almond, cashew, or a combination for your own signature version
- For an extra decadent version, do a thin layer of peanut butter, then chocolate, then another layer of peanut butter before the final chocolate coat
- If you want it vegan, use vegan chocolate and make sure your peanut butter is purely just peanuts and salt
 Pin it
 This has become my go-to when I want to bring something homemade to a gathering without spending hours in the kitchen. It's the kind of recipe that makes people think you're more sophisticated than you actually are, and that's its best kept secret.